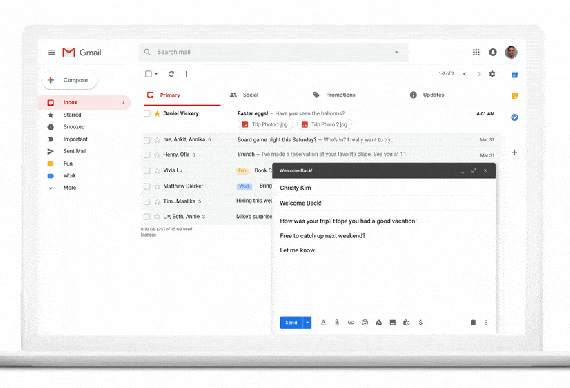
Have you ever composed an email in Gmail but wanted to send it later? Maybe you’re working late and don’t want to bombard your coworkers with emails after hours, or perhaps you want to email someone in a different time zone at a more convenient time for them.
Whatever the reason, Gmail has a handy feature that allows you to schedule emails to be sent later. In this blog post, we’ll walk you through scheduling emails in Gmail to send later.
Step 1: Compose your email.
The first step is to compose your email as you usually would. This means entering the recipient’s email address, writing the subject line, and crafting your message. Ensure you proofread your email carefully and attach any necessary files or links before moving on to the next step.
Read more About Free Email Marketing Tools
Step 2: Click the arrow next to the Send button.
Once you’ve finished composing your email, you’ll notice a blue Send button in the bottom right corner of the compose window. However, instead of clicking Send, click the small arrow next to the button. This will open a drop-down menu with several options.
Step 3: Select “Schedule send” From the drop-down menu, select “Schedule send.”
This will open a new window allowing you to choose the date and time you want your email sent. You’ll see a few pre-set options, such as “Tomorrow morning” and “Next week,” or you can choose a specific date and time by clicking the “Pick date & time” option.
Step 4: Choose the date and time.
Once you’ve clicked “Pick date & time,” a calendar will appear. You can use this calendar to choose the date you want your email sent. Once you’ve selected a date, you’ll see a clock allowing you to choose the time you want your email sent. Make sure to choose the correct time zone to send your email at the intended time.
Step 5: Click “Schedule send”.
Once you’ve chosen the date and time for your email, click the blue “Schedule send” button. Your email will now be scheduled to be sent at the specified date and time.
Step 6: View scheduled emails.
If you want to view or edit your scheduled emails, click the three horizontal lines in the top left corner of your Gmail inbox. This will open a menu where you can select “Scheduled” to view your scheduled emails. From here, you can edit the date and time or cancel the email altogether.

Some Pro Tips for Scheduling Email in Gmail
Indeed, I’d be happy to share some tips for scheduling emails in Gmail. Here are some tips to help you schedule your emails like a pro:
1. Use Boomerang for Gmail:
Boomerang is a popular plugin for Gmail that allows you to schedule emails to be sent later. It also provides other features, such as email reminders and the ability to track responses. Boomerang can be used for free for up to 10 messages per month, but paid plans are available if you need to send more.
2. Utilize the “Undo Send” Feature:
Gmail has an “Undo Send” feature that allows you to cancel sending an email for a few seconds after you click send. You can enable this feature by selecting ” General ” in the Settings menu in Gmail and selecting “General.” From there, you can choose how many seconds you want to have to cancel the send.
3. Use Google Calendar:
Another way to schedule emails in Gmail is by using Google Calendar. You can create an event in Google Calendar and add an email as an attachment to that event. Then, you can set the event to remind you to send the email at a specific time.
4. Customize Your Email Time zone:
If you travel frequently or work with people in different time zones, you may want to customize your email time zone settings. This way, when you schedule an email to be sent later, it will be sent at the appropriate time for the recipient’s time zone. You can do this by selecting ” General ” in the Settings menu in Gmail and selecting “General.” From there, you can change your time zone settings.
5. Use Canned Responses:
Canned Responses is a feature in Gmail that allows you to save and reuse emails you send frequently. You can also use this feature to schedule emails to be sent later. Simply create the canned response, then schedule it to be sent later using one of the methods above.
6. Use Google Sheets:
Google Sheets is a spreadsheet program that is part of the Google Drive suite of tools. You can use Google Sheets to create a spreadsheet of emails you want to send later. Then, you can use a script or a plugin to schedule those emails to be sent automatically.
7. Don’t Overdo It:
Finally, it’s important to remember that scheduling emails can be helpful, but it’s important not to overdo it. If you’re constantly scheduling emails to be sent later, you may create a backlog of emails that you’ll have to deal with later. Balancing scheduling emails and dealing with them in real time is crucial.
In conclusion, there are many ways to schedule emails in Gmail. Whether you use a plugin like Boomerang, utilize the “Undo Send” feature, or create events in Google Calendar, there’s a method that will work for you. Just remember to use scheduling wisely and not overdo it. You’ll be well on your way to becoming an email scheduling pro.


